Tuesday, December 16, 2014

Memcache and PHP

In this post I'm going to use PHP Memcache module as an interface to memcached. If you need to reduce the database load for your webapp this approach seems pretty cool.

I assume you have already installed PHP/MySQL and a compiler on your machine. You can install "build-essential" in order to install Memcache.
sudo apt-get install build-essential

Install php5-memcache
sudo apt-get install php5-memcache

Install Memcache daemon
sudo apt-get install memcached

Install PHP Pear
sudo apt-get install php-pear
Add Memcache using PECL module
sudo pecl install memcache
Update memcache.ini using following,
extension=memcache.so
Verify  Memcache installation

i) Try telnetting to your Memcache instance using,
telnet localhost 11211
ii) phpinfo()


Lets write our first simple PHP script,
<?php
$memcache = new Memcache();
$memcache->addServer('localhost', 11211) or die ("Could not connect");
$key = md5('my-name'); // Unique key
$cache_result = array();
$cache_result = $memcache->get($key); // Memcached object
if($cache_result){
// Second Request
$demos_result=$cache_result;
echo "Result found in memcache\n";
}else{
// Initial Request
$name= "Udara R";
$memcache->set($key, $name);
echo "Result not found in memcache, added to the memcache \n";
}
echo $cache_result."\n";
?>
So here I'm using md5 value of the "my-name" string as the key, you can use unique ID (UUID)  while storing values in Memcache.
$key = md5('my-name');

Then I'm trying to retrieve existing value attached to my key,
$cache_result = $memcache->get($key);
If we are unable to retrieve anything from Memcache, then set key-value pair using,
$memcache->set($key, $name);
Our objective is to reduce the database load in this post, so we can interrupt our data retrieve logic to find relevant data in Memcache first, then query from database and put in to the cache layer, if not exists.

Friday, December 12, 2014

Make developer life easy - Vagrant

I recently wrote a post on docker, similar tool which makes developer life easy. Then I tried another neat tool "Vagrant" and thought of putting this post so I can follow these steps at anytime :)

Instead of every team member working on their own local server with own configuration, you can configure a portable dev workstation which is identical to your QA/Production environment.Any one at any time can spin their own dev workstation without making any configuration/application changes in their actual machine.

You can find list of available Vagrant boxes here[1]. These are available in various flavors such as VirtualBox, VMware, AWS etc...

I'm going to try ubuntu/trusty32 on VirtualBox where I'm going to configure apache server to host a simple webapp. Before that we need to install Vagrant & VirtualBox on the host machine.

sudo apt-get install vagrant
VirtualBox : https://www.virtualbox.org/wiki/Linux_Downloads

1. Add required Vagrant box to the host machine. This will be an one-time download after this you can spin any number of vagrant virtual machines using this box.
vagrant box add ubuntu/trusty32
udara@udara-home:~/workspace/vagrant$ vagrant box add ubuntu/trusty32
==> box: Loading metadata for box 'ubuntu/trusty32'
    box: URL: https://vagrantcloud.com/ubuntu/trusty32
==> box: Adding box 'ubuntu/trusty32' (v14.04) for provider: virtualbox
    box: Downloading: https://vagrantcloud.com/ubuntu/boxes/trusty32/versions/14.04/providers/virtualbox.box
==> box: Successfully added box 'ubuntu/trusty32' (v14.04) for 'virtualbox'!


2. Initialize current directory as a Vagrant environment  
vagrant init ubuntu/trusty32
udara@udara-home:~/workspace/vagrant$ vagrant init ubuntu/trusty32
A `Vagrantfile` has been placed in this directory. You are now
ready to `vagrant up` your first virtual environment! Please read
the comments in the Vagrantfile as well as documentation on
`vagrantup.com` for more information on using Vagrant.


init command will create the Vagrantfile config with the following properties within the current working directory.
VAGRANTFILE_API_VERSION = "2"
Vagrant.configure(VAGRANTFILE_API_VERSION) do |config|
config.vm.box = "ubuntu/trusty32"

3. Spin up trusty32 box.
vagrant up
udara@udara-home:~/workspace/vagrant$ vagrant up
Bringing machine 'default' up with 'virtualbox' provider...
==> default: Importing base box 'ubuntu/trusty32'...
==> default: Matching MAC address for NAT networking...
==> default: Checking if box 'ubuntu/trusty32' is up to date...
==> default: Setting the name of the VM: vagrant_default_1418340978158_41043
.....

.....
==> default: Machine booted and ready!
==> default: Checking for guest additions in VM...
==> default: Mounting shared folders...
    default: /vagrant => /home/udara/workspace/vagrant


This command will start your VM using the configuration provided within the 
Vagrantfile(here we are using default) You can see the running Vagrant box if you open the VirualBox application.


4. Access shell of our vagrant machine.
vagrant ssh
udara@udara-home:~/workspace/vagrant$ vagrant ssh
Welcome to Ubuntu 14.04.1 LTS (GNU/Linux 3.13.0-43-generic i686)

 * Documentation:  https://help.ubuntu.com/

  System information as of Thu Dec 11 23:36:38 UTC 2014

  System load:  0.74              Processes:           88
  Usage of /:   2.6% of 39.34GB   Users logged in:     0
  Memory usage: 11%               IP address for eth0: 10.0.2.15
  Swap usage:   0%

  Graph this data and manage this system at:
    https://landscape.canonical.com/

  Get cloud support with Ubuntu Advantage Cloud Guest:
    http://www.ubuntu.com/business/services/cloud

0 packages can be updated.
0 updates are security updates.


vagrant@vagrant-ubuntu-trusty-32:~$


This command will SSH into the running Vagrant machine.

5. Assign IP Adress to our guest machine.

Go back to your host machine by using command exit.
Update existing Vagrantfile with the following content. I'm using Guest IP Address as 33.33.3.3 here.
 config.vm.network "private_network", ip: "33.33.3.3"
In order to reflect this change to our Vagarnt box we have to use reload command,
vagrant reload
udara@udara-home:~/workspace/vagrant$ vagrant reload
==> default: Attempting graceful shutdown of VM...
==> default: Checking if box 'ubuntu/trusty32' is up to date...
==> default: Clearing any previously set forwarded ports...
==> default: Fixed port collision for 22 => 2222. Now on port 2200.
==> default: Clearing any previously set network interfaces...
==> default: Preparing network interfaces based on configuration...
    default: Adapter 1: nat
    default: Adapter 2: hostonly
==> default: Forwarding ports...
    default: 22 => 2200 (adapter 1)
==> default: Booting VM...
.....

.....
==> default: Machine already provisioned. Run `vagrant provision` or use the `--provision`
==> default: to force provisioning. Provisioners marked to run always will still run.


This will restart the existing box and load the new configuration.

6. Let's install Apache web server on our Vagrant box. SSH again using the vagrant ssh command as in step 4. Then run following command to install apache2.
sudo apt-get install apache2
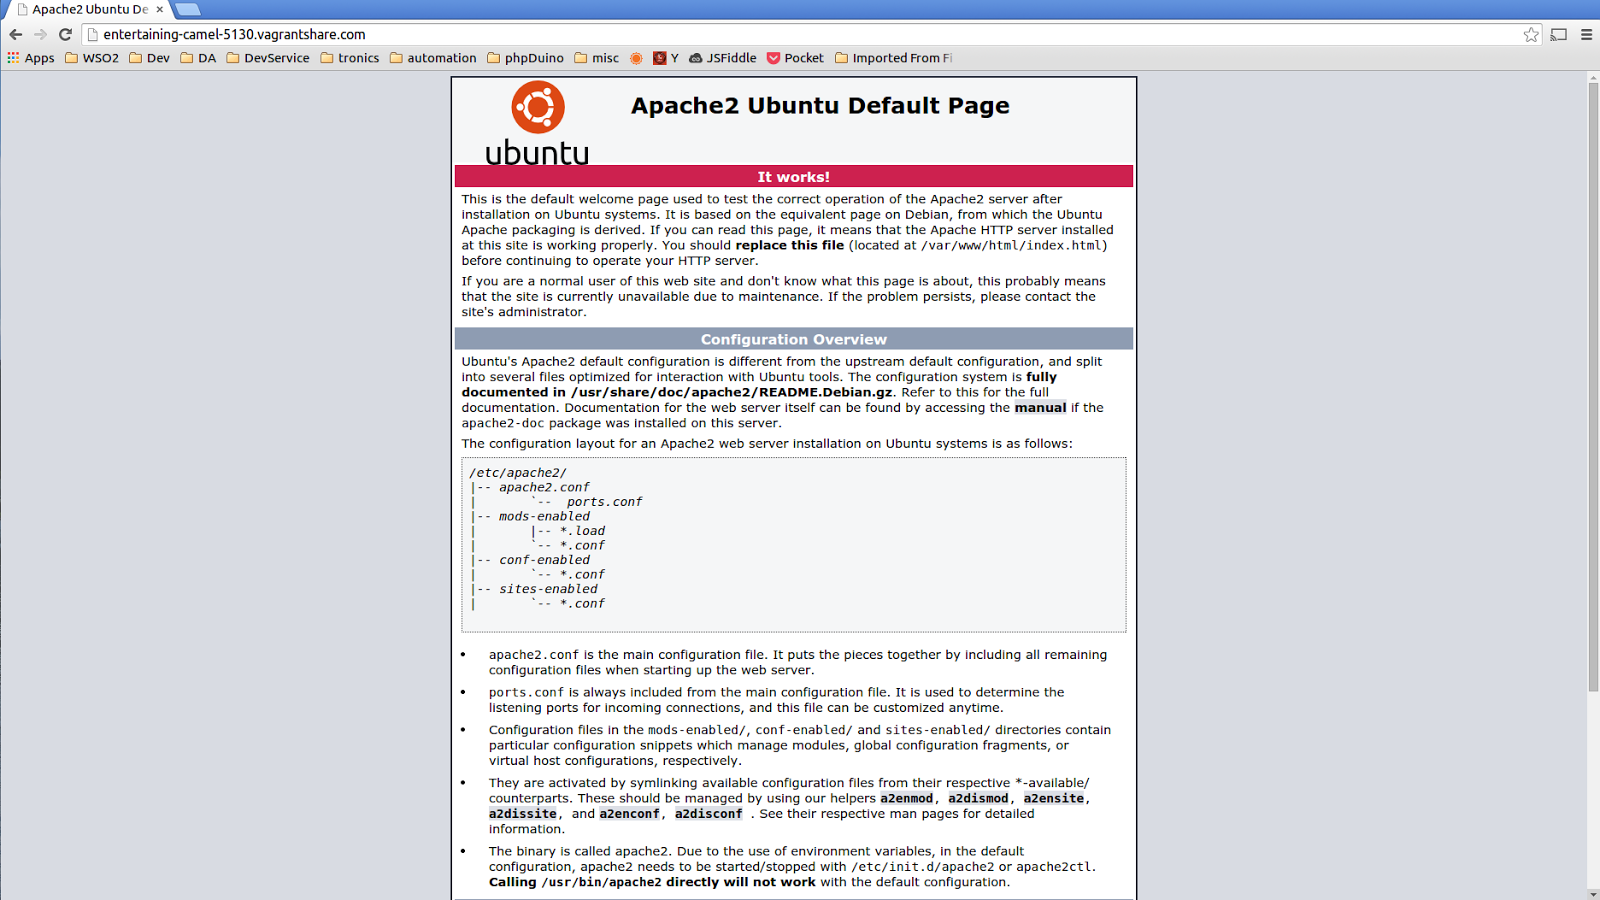
This command will install and start the apache server with default configs. Now if you browse 33.33.3.3 from your host machine you will get the defualt "It Works" page,


7. Sync directories between the host & Guest OSs.

a) Create sample file sync.txt within your host's vagrant workspace.

udara@udara-home:~/workspace/vagrant$ ls
sync.txt  Vagrantfile


b) SSH in to the guest machine using vagrant ssh.


c) Change directory in to /vagrant using cd /vagrant/ . If you list files within this directory you can find the sync.txt created on your host machine inside the guest as well.

vagrant@vagrant-ubuntu-trusty-32:/vagrant$ ls
Vagrantfile  sync.txt


Vagrant keep the folders in sync so you can use the host machine to update your project and keep sync without any hassle. By default, Vagrant shares your project directory but you can add any additional directories using.
config.vm.synced_folder "<host_directory_path>", "<guest_directory_path>"

8. Share and collaborate environments, This allows you to share Vagrant environment to anyone by providing a unique URL which routes to your vagrant box.

a) Create account at hashicorp.
b) Use vagrant command within your teminal to get access.
vagrant login
udara@udara-home:~/workspace/vagrant$ vagrant login
In a moment we'll ask for your username and password to Vagrant Cloud.
After authenticating, we will store an access token locally. Your
login details will be transmitted over a secure connection, and are
never stored on disk locally.

If you don't have a Vagrant Cloud account, sign up at vagrantcloud.com

Username or Email: udarar@wso2.com
Password (will be hidden):
You're now logged in!


c) Share using vagrant share command.
vagrant share
udara@udara-home:~/workspace/vagrant$ vagrant share
==> default: Detecting network information for machine...
    default: Local machine address: 33.33.3.3
    default: Local HTTP port: 80
    default: Local HTTPS port: disabled
==> default: Checking authentication and authorization...
==> default: Creating Vagrant Share session...
    default: Share will be at: entertaining-camel-5130
==> default: Your Vagrant Share is running! Name: entertaining-camel-5130
==> default: URL: http://entertaining-camel-5130.vagrantshare.com


By using the provided URL we can browse our apache server from anywhere now :)


You can terminate this session by pressing ctrl+c.

9. Remove environment
vagrant destroy

udara@udara-home:~/workspace/vagrant$ vagrant destroy
    default: Are you sure you want to destroy the 'default' VM? [y/N] y
==> default: Destroying VM and associated drives...


[1] https://vagrantcloud.com/boxes/search

Thursday, December 11, 2014

Enabling secure vault in WSO2 BPS

You can enable secure vault in any WSO2 product, which prevents us keeping plain text password in carbon configurations using WSO2 Carbon Secure Vault documentation.

But in BPS, <BPS_HOME>/repository/conf/datasources/master-datasources.xml is bit different from other products. This includes only WSO2_CARBON_DB related data-source configurations(may be other data-source definitions according to your deployment).

We have a separate <BPS_HOME>/repository/conf/datasources.properties file with the bps related data-source configs.

At the moment there is no direct way to enable secure vault for this config. But we can move config data within datasources.properties in to the
master-datasources.xml and follow the default guidelines.

1. Update existing master-datasources.xml with following data-source configuration.
<datasource>
    <name>BPS_DS</name>
    <description></description>
    <jndiConfig>
        <name>bpsds</name>
    </jndiConfig>
    <definition type="RDBMS">
        <configuration>
        <url>jdbc:mysql://localhost:3306/bps?autoReconnect=true</url>
        <username>bps_user</username>
        <password>bps_password</password>
        <driverClassName>com.mysql.jdbc.Driver</driverClassName>
        <maxActive>150</maxActive>
        <maxWait>360000</maxWait>
        <minIdle>5</minIdle>
        <testOnBorrow>true</testOnBorrow>
        <validationQuery>SELECT 1</validationQuery>
        <validationInterval>30000</validationInterval>
        <jdbcInterceptors>QueryTimeoutInterceptor(queryTimeout=30)</jdbcInterceptors>
        <timeBetweenEvictionRunsMillis>60000</timeBetweenEvictionRunsMillis>
        <numTestsPerEvictionRun>15</numTestsPerEvictionRun>
        <testWhileIdle>true</testWhileIdle>
        </configuration>
    </definition>
</datasource>
make sure to update url, username, password, driverClassName according to your environment.

2. Remove existing datasources.properties file.

3. Comment following lines in attachment-management.xml which locates at <BPS_HOME>/repository/conf/ directory.
            <JNDIInitialContextFactory>com.sun.jndi.rmi.registry.RegistryContextFactory</JNDIInitialContextFactory><JNDIProviderUrl>rmi://localhost:2199</JNDIProviderUrl>
4. Comment following line in bps.xml which locates at <BPS_HOME>/repository/conf/ directory.
<tns:JNDI contextFactory="com.sun.jndi.rmi.registry.RegistryContextFactory" providerURL="rmi://localhost:2199"/>
5. Comment following lines in humantask.xml file which locates at <BPS_HOME>/repository/conf/ directory.
        <JNDIInitialContextFactory>com.sun.jndi.rmi.registry.RegistryContextFactory</JNDIInitialContextFactory><JNDIProviderUrl>rmi://localhost:2199</JNDIProviderUrl>
We are done with the data-source configuration.

There is b4p-coordination-config.xml configuration file with plain text password, which we need to secure. You can follow "Securing username/password with secure vault section" here[2].

There is a separate configuration to "Retired BPEL Package Cleanup" where we have plain text password. Since this is for a specific task which has no direct relationship to the BPS runtime we can remove plain-text password here. So you have put it back when you need to run process-cleanup command line tool(processcleanuptool.sh|processcleanuptool.bat for Windows).

Note:- All above configuration changes work well in a BPS-3.2.0 deployment.

[1] https://docs.wso2.com/display/Carbon420/WSO2+Carbon+Secure+Vault
[2] https://docs.wso2.com/display/BPS320/Advanced+Configurations+for+Human+Task+Coordination

banish404 | Easy way to remove stale PPAs and Software-Sources

Are you having trouble manually updating PPAs and Software-Sources from your Ubuntu box to solve 404 not founds while updating the system. (I tried banish404 on 13.10).

Issues I'm having while running apt update,
 
Err http://ppa.launchpad.net saucy/main amd64 Packages
  404  Not Found
Err http://ppa.launchpad.net saucy/main i386 Packages
  404  Not Found

Ign http://ppa.launchpad.net saucy/main Translation-en_US
Ign http://ppa.launchpad.net saucy/main Translation-en
Ign http://ppa.launchpad.net saucy/main Translation-en_US
Ign http://ppa.launchpad.net saucy/main Translation-en
Ign http://ppa.launchpad.net saucy/main Translation-en_US
Ign http://ppa.launchpad.net saucy/main Translation-en
Ign http://ppa.launchpad.net saucy/main Translation-en_US
Ign http://ppa.launchpad.net saucy/main Translation-en
Fetched 13.0 kB in 16s (772 B/s)
W: Failed to fetch http://ppa.launchpad.net/psyke83/ppa/ubuntu/dists/saucy/main/binary-amd64/Packages  404  Not Found

W: Failed to fetch http://ppa.launchpad.net/psyke83/ppa/ubuntu/dists/saucy/main/binary-i386/Packages  404  Not Found

E: Some index files failed to download. They have been ignored, or old ones used instead.


banish404 is a simple tool to automate this hassle.

sudo add-apt-repository ppa:fossfreedom/packagefixes
sudo apt-get update
sudo apt-get install banish404

How to use,
sudo banish404
This will ask for your permission one-by-one to remove stale PPAs and  Software-Sources.More importantly it will back-up your existing sources in to the /etc/apt/ directory.

udara@udara-home:~$ sudo banish404
sources backup folder: /etc/apt/sources_20141210-12:18:33
: 3 3    
checking PPAs...
Disabling /etc/apt/sources.list.d/psyke83-ppa-saucy.list...
Done!
Disabling /etc/apt/sources.list.d/psyke83-ppa-saucy.list...
Done!
checking software sources...


Now if I run apt update, I don't see any 404 not founds.

Tuesday, December 2, 2014

DOM compatibility & fallbacks

DOM compatibility is somewhat a headache for front-end developers when it comes to creating cross-browser support webapps.
I'm writing this small note to self ;) , on a fall-back hack which we can use to overcome this headache.


I'm taking innerText & textContent properties to explain this further,


This image[Screen-shot from 1] depicts browser support for innerText & textContent properties.

In order to support this we can use something like following,
//create div element
var div = document.createElement('div');
//check textContent support
if (div.textContent) { 

     div.textContent = "textContent support exists.";
// go for the fall-back
} else if (div.innerText) { 

     div.innerText = "No textContent support."; 
}
So with this we don't need to worry about setting content to our div.

[1] http://www.quirksmode.org/dom/html/

Sunday, November 30, 2014

Jump in to the world of containers with docker

Why we need containers?

If we consider SDLC there are number of parties involve in different activities on our application.

Eg :- Developers, Testers, SysAdmins etc

There are various problems which these people need to address, because of platform and dependency standardization problems.

Docker address this problem with an open platform which "Build, Ship and Run Any App, Anywhere". Why docker VM's have already solved this problem? yes but with a virtual machine we are shipping our application+dependencies (assume 200MB) + guest OS (> 1GB) ouch :( that is painful.

Compared to VM, docker container includes only our application+dependencies :) Docker engine runs on top of the host OS and it's portable.

Let's jump in to our container, in this sample I'm going to create a docker container to ship WSO2 Enterprise store.

udara@udara-home:~$ sudo docker images
[sudo] password for udara:
REPOSITORY          TAG                 IMAGE ID            CREATED             VIRTUAL SIZE
ubuntu              latest              86ce37374f40        4 days ago          192.7 MB


I have ubuntu docker image with me and I'm going to start it.
sudo docker run -i -t ubuntu /bin/bash

With the above docker command I can login to the terminal of our newly created node,

udara@udara-home:~$ sudo docker run -i -t ubuntu /bin/bash
root@df8485e65e93:/#


Before running Enterprise Store inside our container I need to follow installation guidelines available here. So in this scenario we need to install JDK within our container.

Run following commands within your container terminal to install Java, zip and unzip.
apt-get install software-properties-common
add-apt-repository ppa:webupd8team/java
apt-get update
apt-get install oracle-java7-installer zip unzip

During this process if get "apt-get can't find the package" error similar to following as in my case use following command to lists to use old-releases.ubuntu.com,
sudo sed -i -e 's/archive.ubuntu.com\|security.ubuntu.com/old-releases.ubuntu.com/g' /etc/apt/sources.list

Err http://archive.ubuntu.com/ubuntu/ quantal/main openssl amd64 1.0.1c-3ubuntu2
  404  Not Found [IP: 91.189.91.14 80]
Err http://archive.ubuntu.com/ubuntu/ quantal/main ca-certificates all 20120623
  404  Not Found [IP: 91.189.91.14 80]
Err http://archive.ubuntu.com/ubuntu/ quantal/main libgirepository-1.0-1 amd64 1.33.14-1
  404  Not Found [IP: 91.189.91.14 80]
Err http://archive.ubuntu.com/ubuntu/ quantal/main gir1.2-glib-2.0 amd64 1.33.14-1
  404  Not Found [IP: 91.189.91.14 80]
Err http://archive.ubuntu.com/ubuntu/ quantal/main iso-codes all 3.38-1
  404  Not Found [IP: 91.189.91.14 80]
Err http://archive.ubuntu.com/ubuntu/ quantal/main python-apt-common all 0.8.7ubuntu4
  404  Not Found [IP: 91.189.91.14 80]
Err http://archive.ubuntu.com/ubuntu/ quantal/main python3-apt amd64 0.8.7ubuntu4
  404  Not Found [IP: 91.189.91.14 80]
Err http://archive.ubuntu.com/ubuntu/ quantal/main python3-dbus amd64 1.1.1-1
  404  Not Found [IP: 91.189.91.14 80]
Err http://archive.ubuntu.com/ubuntu/ quantal/main python3-gi amd64 3.4.0-1
  404  Not Found [IP: 91.189.91.14 80]
Err http://archive.ubuntu.com/ubuntu/ quantal/main unattended-upgrades all 0.79.3ubuntu4
  404  Not Found [IP: 91.189.91.14 80]
Err http://archive.ubuntu.com/ubuntu/ quantal/main python3-software-properties all 0.92.9
  404  Not Found [IP: 91.189.91.14 80]
Err http://archive.ubuntu.com/ubuntu/ quantal/main software-properties-common all 0.92.9

Set JAVA_HOME property using,
export JAVA_HOME=/usr/lib/jvm/java-7-oracle

Since Java is the only dependency to start any WSO2 product, I'm going to save the container status so I can create a container with any other product in future without installing Java.

Before Creating a new image from the above changes, we need to get our container ID,

How to list existing containers ID?

udara@udara-home:~$ sudo docker ps
CONTAINER ID        IMAGE               COMMAND             CREATED             STATUS              PORTS               NAMES
df8485e65e93        ubuntu:latest       "/bin/bash"         6 minutes ago       Up 6 minutes                            compassionate_elion  
10a4800560de        ubuntu:latest       "/bin/bash"         27 minutes ago      Up 27 minutes                           dreamy_nobel


Let's find out changes we have done to the existing container by running,
sudo docker diff <container_id>
Eg :- sudo docker diff e69ccb432919

Ok, now I'm going to create new docker image by providing name "udara/java7"
sudo docker commit e69ccb432919 udara/java7

Our new image "udara/java7" is listed if I run command sudo docker images

udara@udara-home:~$ sudo docker images
REPOSITORY          TAG                 IMAGE ID            CREATED             VIRTUAL SIZE
udara/java7         latest              76f948ba0aff        24 seconds ago      762.3 MB
ubuntu              latest              86ce37374f40        4 days ago          192.7 MB
base                latest              b750fe79269d        20 months ago       175.3 MB
base                ubuntu-12.10        b750fe79269d        20 months ago       175.3 MB
base                ubuntu-quantal      b750fe79269d        20 months ago       175.3 MB
base                ubuntu-quantl       b750fe79269d        20 months ago       175.3 MB


Lets start Enterprise Store instance within our initial docker image,

Before that we need to copy Enterprise Store distribution from our host OS to docker image. You need to run following commands within your host OS.

Run following command to get the full container ID
sudo docker inspect -f  '{{.Id}}'<container_id>
Eg:- sudo docker inspect -f  '{{.Id}}' e69ccb432919

This command will return the full container ID, in my case its,

udara@udara-home:~$ sudo docker inspect -f   '{{.Id}}' e69ccb432919
e69ccb432919f7432e1cf804693662a9adc61fc5a10f16d1a87b0ff7993b1254


Let's copy ES to the docker image using following command.
sudo cp wso2store-1.0.0.zip /var/lib/docker/aufs/mnt/<full_container_id>/tmp/

Eg:-

sudo cp wso2store-1.0.0.zip /var/lib/docker/aufs/mnt/e69ccb432919f7432e1cf804693662a9adc61fc5a10f16d1a87b0ff7993b1254/tmp/

I copied wso2store-1.0.0.zip in to the /tmp directory of my docker instance. Go into the /tmp directory an unzip ES distribution. Change directory to wso2store-1.0.0/bin and start ES instance using sh wso2server.sh

Now let's create a separate Docker image consists of ES distribution which we can share among core developers/QA team. They can just start ES instance without worrying about underlying dependencies. (this example only Java but in a real world project there can be thousands of dependencies)

If you are new to docker follow this try-it tool available on your browser. If you want to try docker on your local machine here is the link to installation.Docker is available on almost all environments.

Wednesday, November 26, 2014

Path to linux screen

Screen makes dev/devops life easy in many ways,

1. If you want to keep a shell active, even with network/ssh interrupts.
2. Resume previous shell from another location
3. Keep a long running process

i). Start named screen, I will explain why we need a name in later step.

screen -R <name> 
Eg : - screen -R udara

If you don't have screen installed on your system run,

sudo apt-get install screen

ii). De-attach from the current screen

ctrl+a+d , this will return you back to the default shell( where you start screen)

This is the interesting and powerful feature of shell, where you can De-attach or Re-attach to the same screen.

iii). Re-attach to the same screen

screen -r will re-attach you to the previous screen.

But let's assume we have multiple De-attached screens, screen -r will list down all existing screens in that case.

Eg :-

udara@udara-home:~$ screen -r
There are several suitable screens on:
    5192.udara    (2014-11-25 10:41:15)    (Detached)
    5135.JMeter    (2014-11-25 10:40:59)    (Detached)
Type "screen [-d] -r [pid.]tty.host" to resume one of them.


This is where screen name comes handy :) You can easily recognize which screen you need to Re-attach. So use a meaningful name when starting your screen.

iv). Re-attach to a screen, when there are multiple De-attached screens

screen -r <screen-name>
Eg :-  screen -r 5192.udara

v). List existing screens 
Yes, If you have multiple screens screen -r will list down all existing screens. But there is a specific list command to do this.

screen -ls
screen -list


udara@udara-home:~$ screen -ls
There are screens on:
    5410.pts-7.udara-home    (2014-11-25 10:51:20)    (Detached)
    5192.udara    (2014-11-25 10:41:15)    (Detached)
    5135.JMeter    (2014-11-25 10:40:59)    (Detached)
3 Sockets in /var/run/screen/S-udara.


These are some basic commands which we can use to make our life easy, refer screen man page for more commands/shortcuts.

Wednesday, November 19, 2014

JMeter Loop Controller & Counter


Why we need loop controller[1] in JMeter?
Assume you need to run the same HTTP request(sampler) multiple times, rather than creating duplicate samplers we can use this handy logic controller available in JMeter.

Eg:- Publish 1000 APIs to WSO2 API Manager, Benchmark web-server concurrent requests handle

Lets take the first sample scenario, We can create a HTTP request sampler which publishes API. (before that we need to create a HTTP request to login which is out of loop controller scope)

1. Create a Loop Controller using Add> Logic Controllers> Loop Controller,


2. Add a Counter to above Controller using, Add> Config Element> Counter,


 3. Create sampler(s) according to your requirement, here I'm creating Add API HTTP Request Sampler, (Add> Sampler> HTTP Request),


You can see I'm appending ${api_id} for some request parameter values. This value will be initialized and incremented within our Counter(step 2). In my scenario I can't publish multiple APIs with the same name & context.

I tried this loop 20 times by updating Loop Count and Maximum values to 20. You can see multiple "Add API HTTP Request" & "Publish API HTTP Request" sampler requests,


[1] http://jmeter.apache.org/usermanual/component_reference.html#Loop_Controller

Wednesday, November 12, 2014

Run JMeter in command line

There are use-cases where you can't use JMeter GUI to run the script.

Eg :- during distributed JMeter load testing, run jmx from a remote machine (just using command line)

Following are the steps which I followed to run JMeter script in command line.

1. Create JMeter script in your local machine.(yes, using the GUI ;) )
2. Setup JMeter in the remote machine.
  •  SCP apache-jmeter-X.XX.zip and created jmx in step 1.
3. Access remote machine using command line. (ssh ;))
4. Move and setup apache-jmeter-X.XX.zip and jmx according to your preference.

I have extracted  apache-jmeter-X.XX.zip inside my home directory(remote machine) and able to move to bin directory using,
cd /home/udara-aws/apache-jmeter-2.11/bin
Copied test.jmx script in to the same location.

Lets run this script in command line now.
sh jmeter.sh -n -t test.jmx -l log.jtl
Here we have used -n -t and -l arguments.

-n denotes –nongui run JMeter in nongui mode
-t denotes –testfile  jmx file which needs to run
-l denotes  –logfile file to put sampler logs (jtl)

Following is the output I got, If you are not getting summery results make sure to attach "Generate Summary Results" listener to relevant samplers.

udara@udara-aws:~/apache-jmeter-2.11/bin$ sh jmeter.sh -n -t test.jmx -l log.jtl
Creating summariser <summary>
Created the tree successfully using test.jmx
Starting the test @ Tue Nov 11 19:29:28 UTC 2014 (1415734168842)
Waiting for possible shutdown message on port 4445
summary +      1 in   3.3s =    0.3/s Avg:  3324 Min:  3324 Max:  3324 Err:     0 (0.00%) Active: 1 Started: 1 Finished: 0
summary +      6 in   4.1s =    1.5/s Avg:   676 Min:   124 Max:  1756 Err:     0 (0.00%) Active: 0 Started: 1 Finished: 1
summary =      7 in     8s =    0.9/s Avg:  1054 Min:   124 Max:  3324 Err:     0 (0.00%)
Generate Summary Results for list APIs =      1 in   1.1s =    0.9/s Avg:  1065 Min:  1065 Max:  1065 Err:     0 (0.00%)
Generate Summary Results for List Subscriptions =      1 in     1s =    1.6/s Avg:   637 Min:   637 Max:   637 Err:     0 (0.00%)
Tidying up ...    @ Tue Nov 11 19:29:36 UTC 2014 (1415734176890)
... end of run

Sunday, November 9, 2014

Measure tempreture using TMP35 sensor

After receiving my LCD this came to my mind, as a weekend project :)

Ingredients

1. Arduino (I'm using uno here)
2. Breadboard with jumper cables (create the prototype)
3. LCD (I'm using 2*16)
4. TMP35 Sensor
5. USB cable

Other than that I have used a potentiometer(variable resistor) to control brightness of the LCD.

Let's configure our LCD first, I have used the following circuit found here[1].


Next step is to configure our temperature sensor. I'm using a TMP35 sensor for this, this provides a voltage output linearly proportional to the temperature. So we have to do some math within our program to output temperature in Celsius.

One more thing, unlike our LCD TMP35 provides analog signal as it's output. So we have to plug in to an analog pin located in Arduino.

Connect Analog out pin (middle one) to the A0 analog pin. Then + pin to the positive bus of our breadboard and - end to the ground bus. (make sure to plug these two pins in correct way, refer following image) 


Now we are good to proceed to our program since we are done with the circuit prototype. Connect Arduino into a computer and open ArduinoIDE to write the sketch.You can find complete sketch here.
#Adding LCD library
#include <LiquidCrystal.h>
#Init LCD library with digital pin 12, 11, 5, 4, 3 and #2   
LiquidCrystal lcd(12, 11, 5, 4, 3, 2);                           
const int sensorPin = A0;
void setup() {
    lcd.begin(16, 2);
    Serial.begin(9600);
}
void loop() {
    #Read the sensor value
    int sensorVal = analogRead(sensorPin);
    #Convert reading to voltage
    float voltage = (sensorVal/1024.0) * 5.0;
    #convert millivolts into temperature
    float temperature = (voltage - .5) * 100;
    lcd.print("Room Temp: ");
    lcd.print(temperature);
    delay(1000);
    lcd.clear();
Now upload this sketch into your Arduino and here is our final outcome :)


[1] http://arduino.cc/en/Tutorial/LiquidCrystal

Thursday, November 6, 2014

AV cable and raspberry pi B+

I'm able to taste the latest revision of Raspberry Pi, the model B+ recently. Compared to the previous version this has more advantages,

1) 40 GPIO pins
2) 4 USB ports
3) Neat micro SD slot with push to release capability
4) 3.5mm integrated Audio/video port

We can find tons of information available on-line about first three, but found the last point bit complicated.

If you have a nice HDMI supported monitor or TV no need to worry about this. But if you are going to plug your Raspberry pi B+ to an old fashioned TV with a AV cable this post might helps you :)

Selecting a cable,
This is bit tedious task since there is no standard for AV cable pinouts. Found this post which is really helpful for this task.

FYI : I bought zune AV cable with the correct pinout configuration for Raspberry pi B+.

Even with the correct cable you won't get this to work in first attempt :(

I tried with the NOOBS installation, by default NOOBS configures HDMI output with higher priority than our poor AV out.

You can find this configuration in /boot/config.txt file,
hdmi_force_hotplug=1 config_hdmi_boost=4
 I have commented out above default configuration and added following, with this configuration even if you have a HDMI monitor plugged in it will use the composite output.

hdmi_ignore_hotplug=1
#hdmi_force_hotplug=1
#config_hdmi_boost=4

Saturday, November 1, 2014

Optimizing eclipse IDE on a Ubuntu box

I'm currently using eclipse Luna on my Ubuntu 13.10, IDE crashes after few seconds.
While searching google for a fix I found number of SO replies with following update to eclipse.ini ,
-Dorg.eclipse.swt.browser.DefaultType=mozilla
But it does not seem to fix my issue, then I tweaked existing eclipse.ini as follows,

-startup
plugins/org.eclipse.equinox.launcher_1.3.0.v20140415-2008.jar
--launcher.library
plugins/org.eclipse.equinox.launcher.gtk.linux.x86_64_1.1.200.v20140603-1326
-product
org.eclipse.epp.package.java.product
--launcher.defaultAction
openFile
-showsplash
org.eclipse.platform
--launcher.XXMaxPermSize
512m
--launcher.defaultAction
openFile
--launcher.appendVmargs
-vmargs
-Dosgi.requiredJavaVersion=1.6
-XX:MaxPermSize=512m
#-Xms40m
#-Xmx512m
-Dorg.eclipse.swt.browser.DefaultType=mozilla
I have commented out ms & mx parameters to pick my system parameters, then increased MaxPermSize to 512 MB.

Eclipse issue seems to be fixed now !!

Tuesday, October 21, 2014

Talking to an Arduino from PHP

I was able to talk to my Arduino without using an Ethernet or a wireless shield.
Best part is that I only have 4 lines in my PHP script :)

Things you need to have :

Arduino board with a USB Cable
Breadboard
1 LED
Few jumper wires
220 OHM resistor

Additionally Arduino IDE, PHP, Apache2 installed Linux box :)

1. Connect Arduino's GND pin to breadboard's ground line.
2. Connect Digital pin 13 to breadboard's + line.
3. Connect LED's Anode(long leg) with the breadboard's + line using the 200 OHM resistor.
4. Connect LED's cathode(short leg) with breadboard's - line directly using a jumper cable.

You are done with the circuit prototype, Now connect the Arduino board to your PC.

Open Arduino IDE, click on tools> Serial port. You can see the device connected to a port similar to "/dev/ttyACM0".

Let's write our PHP snippet,

<?php
  $comPort = "/dev/ttyACM0"; /*Update to the correct port */
  $fp =fopen($comPort, "w");
  fwrite($fp, "switch"); /* We are going to write "switch" */
  fclose($fp); 
?>
That is it, host this snippet switch_uno.php within  /var/www/php-arduino directory. lets write our Arduino sketch.

String val;

void setup()
{
    Serial.begin(9600);
    pinMode(13, OUTPUT);
}

void loop()
{
    while (Serial.available()){
        delay(10);
        char c = Serial.read();
        if (c == ','){
            break;
        }

        val+= c;
    }

    if (val == "switch") {
        if(digitalRead(13) == LOW){
            digitalWrite(13, HIGH);
            delay(100);
            Serial.println(1);
        }else if(digitalRead(13) == HIGH){
            digitalWrite(13, LOW);
            delay(100);
            Serial.println(0);
        }
        val="";
    }


}

Upload above sketch to your Arduino and open the serial monitor window within the Arduino IDE.
In order to execute our PHP snippet,
Lets open a terminal window and change directory to the /var/www/php-arduino directory.

run sudo php switch_uno.php your LED will be on :) If you run the same command again LED will be off.

You can do the same by using PHP serial class also.

Monday, June 30, 2014

Publish assets using the API-Postman-WSO2 Enterprise Store

At the moment there are two ways to publish an asset to the ES back-office.

1. Using the UI

Eg: - Browse https://localhost:9443/publisher/asset/ebook
You can find the following UI and add the new asset(ebook in this case)


2. Using the API

This is the subject that I'm going to talk in this post. I'm going to use Postman- REST client for google chrome and CURL to execute this API invocation.

First lets try out with Postman,

Prerequisite :
a) google chrome browser
b) Postman chrome-extension

Steps

i) Browse https://localhost:9443/publisher/ and login in to the back-office.
ii) Browse chrome://apps/ and launch Postman REST client.
iii) Refer following screen-shot and create the POST form-data accordingly.

Note
URL :  https://localhost:9443/publisher/api/asset/ebook
Type : POST


iv) Now you can invoke the API :)

You will receive the following output if it works right..

Lets browse the newly added ebook asset.

I will come up with a separate post on the topic POST multipart/form-data using CURL soon. So you can invoke the same above asset add API using CURL.

Thursday, May 29, 2014

Fronting WSO2 Management Console UI with Nginx

I'm going to set up WSO2 API Manager & WSO2 BAM in Linux environment for this exercise.

Since I'm going to run both products within a single machine need following configuration change,

1. Update port offset configuration as follows within <BAM_HOME>/repository/conf/carbon.xml.
<Offset>1</Offset>
 For API Manager I'm going to use the default configurations.

2. Update /etc/hosts with following and update IP address according to your environment.
10.100.0.128 am.wso2.org
10.100.0.128 bam.wso2.org
 3. Use following configuration within Nginx and update  proxy_pass according to your environment.

server {
    listen 443;
    server_name am.wso2.org;
    ssl on;
        ssl_certificate /etc/nginx/ssl/server.crt;
        ssl_certificate_key /etc/nginx/ssl/server.key;

    location /carbon {
            index index.html;
            proxy_set_header X-Forwarded-Host $host;
            proxy_set_header X-Forwarded-Server $host;
            proxy_set_header X-Forwarded-For $proxy_add_x_forwarded_for;
            proxy_pass https://10.100.0.128:9443;
        }
    location /t {
            index index.html;
            proxy_set_header X-Forwarded-Host $host;
            proxy_set_header X-Forwarded-Server $host;
            proxy_set_header X-Forwarded-For $proxy_add_x_forwarded_for;
            proxy_pass https://10.100.0.128:9443;
        }
 }

server {
    listen 443;
    server_name bam.wso2.org;
    ssl on;
        ssl_certificate /etc/nginx/ssl/server.crt;
        ssl_certificate_key /etc/nginx/ssl/server.key;

    location /carbon {
            index index.html;
            proxy_set_header X-Forwarded-Host $host;
            proxy_set_header X-Forwarded-Server $host;
            proxy_set_header X-Forwarded-For $proxy_add_x_forwarded_for;
            proxy_pass https://10.100.0.128:9444;
        }
    location /t {
            index index.html;
            proxy_set_header X-Forwarded-Host $host;
            proxy_set_header X-Forwarded-Server $host;
            proxy_set_header X-Forwarded-For $proxy_add_x_forwarded_for;
            proxy_pass https://10.100.0.128:9444;
        }
 }


So in this configuration I'm having two server directives, one for API Manager and one for BAM.

Read this post if you need help on creating SSL certificates.

I'm done with the configuration now, lets browse our management console now.

If you type https://am.wso2.org/carbon you will get the API Manager Admin Console UI.

 
After logging using defualt username:admin ,password:admin you may create a new tenant using Home > Configure > Multitenancy > Add New Tenant.

Now try to log-in to that tenant. You will get the following,


Ok, Let's try the BAM admin console now. Browse https://bam.wso2.org/carbon ,


Log-in, create a tenant and try to login using those tenant credentials.


Hope this will help to configure any WSO2 Product with Nginx !!

Tuesday, April 8, 2014

[UES-357] Using IP address or domain name to access UES gadgets

You may get the following error and your gadgets won't work as expected if you try to use an IP address/domain name instead of the default URL with https.

Eg :-

Default :
https://localhost:9443/portal/gadgets/intro-gadget-2/intro-gadget-2.xml

Updated :
https://10.100.0.128:9443/portal/gadgets/intro-gadget-2/intro-gadget-2.xml
or
https://ues.udara.me/portal/gadgets/intro-gadget-2/intro-gadget-2.xml
Detailed error: 500 javax.net.ssl.SSLException: hostname in certificate didn't match: <10.100.1.128> != <localhost> shindig.js:9
By default all WSO2 products shipped with a self signed certificate for the domain localhost, to overcome this issue you have to create and add a certificate for your IP/Domain name.
 1. Lets assume you need to add a self signed certificate for your IP address(10.100.0.128), run following command and provide information when required, here I'm using wso2carbon as my keystore password so I don't have to do any configuration changes.

keytool -genkey -alias ues -keyalg RSA -keystore  ues.jks -keysize 2048

Note :- I have created ues.jks within /home/udara/key/ directory and you have to provide your IP or domain name as your first and last name (CN).
udara@thinkPad:~/key$ keytool -genkey -alias ues -keyalg RSA -keystore  ues.jks -keysize 2048
Enter keystore password: wso2carbon
Re-enter new password: wso2carbon
What is your first and last name?
  [Unknown]:  10.100.0.128
What is the name of your organizational unit?
  [Unknown]: 
What is the name of your organization?
  [Unknown]:  WSO2
What is the name of your City or Locality?
  [Unknown]:  Mountain View
What is the name of your State or Province?
  [Unknown]:  CA
What is the two-letter country code for this unit?
  [Unknown]:  US
Is CN=10.100.0.128, OU=Unknown, O=WSO2, L=Mountain View, ST=CA, C=US correct?
  [no]:  yes

Enter key password for <wso2carbon>
    (RETURN if same as keystore password):  wso2carbon
Re-enter new password: wso2carbon

2.Take a back-up of the current <UES_HOME>/repository/resources/security/ directory.

3.Run following command within <UES_HOME>/repository/resources/security/ directory to import your certificate into wso2carbon.jks.

Since I have created my ues.jks inside /home/udara/key/ directory in step-1,
udara@thinkPad:/wso2/support/workspace/wso2ues-1.0.0/repository/resources/security$ keytool -importkeystore -srckeystore /home/udara/key/ues.jks -destkeystore wso2carbon.jks -srcstoretype jks -deststoretype jks -srcstorepass wso2carbon -deststorepass wso2carbon
Entry for alias ues successfully imported.
Import command completed:  1 entries successfully imported, 0 entries failed or cancelled
4. Since we can't have two different private keys, lets delete the previous one.
udara@thinkPad:/wso2/support/workspace/wso2ues-1.0.0/repository/resources/security$ keytool -delete -alias wso2carbon -keystore wso2carbon.jks -storepass wso2carbon
5.  Lets export our public key from wso2carbon.jks and import it in to the client-truststore.jks.

I) Export public key from wso2carbon.jks as test.cer.
udara@thinkPad:/wso2/support/workspace/wso2ues-1.0.0/repository/resources/security$ keytool -export -keystore ues.jks -alias ues -file test.cer
Enter keystore password: 
Certificate stored in file <test.cer>
II) Import public certificate test.cer into client-truststore.jks.
udara@thinkPad:/wso2/support/workspace/wso2ues-1.0.0/repository/resources/security$ keytool -import -alias ues -file test.cer -keystore client-truststore.jks
Enter keystore password: 
Owner: CN=10.100.0.128, OU=Unknown, O=WSO2, L=Mountain View, ST=CA, C=US
Issuer: CN=10.100.0.128, OU=Unknown, O=WSO2, L=Mountain View, ST=CA, C=US
Serial number: 4a460fad
Valid from: Tue Apr 08 11:49:26 IST 2014 until: Mon Jul 07 11:49:26 IST 2014
Certificate fingerprints:
     MD5:  54:CD:B8:CD:7D:3D:B5:29:2B:A4:45:61:18:C9:5A:59
     SHA1: 53:03:B5:6D:32:D2:07:33:0D:49:7A:37:32:C7:13:DA:4E:29:60:28
     SHA256: C5:23:6D:09:F3:97:45:3A:F8:19:A1:F9:14:18:DE:BC:F3:C7:C9:C1:FF:0E:D9:E6:94:EF:DA:A3:6D:79:36:B9
     Signature algorithm name: SHA256withRSA
     Version: 3

Extensions:

#1: ObjectId: 2.5.29.14 Criticality=false
SubjectKeyIdentifier [
KeyIdentifier [
0000: 92 70 EA 1B 80 6B F8 07   84 0A D9 B0 FE 52 A3 41  .p...k.......R.A
0010: C0 DA B0 17                                        ....
]
]

Trust this certificate? [no]:  yes
Certificate was added to keystore
6. Since we have updated the key store alias from wso2carbon to ues, we have to modify this in few configs to make SSO works.

Update <UES_HOME>repository/conf/carbon.xml,
<KeyStore>
            <!-- Keystore file location-->
            <Location>${carbon.home}/repository/resources/security/wso2carbon.jks</Location>
            <!-- Keystore type (JKS/PKCS12 etc.)-->
            <Type>JKS</Type>
            <!-- Keystore password-->
            <Password>wso2carbon</Password>
            <!-- Private Key alias-->
            <KeyAlias>ues</KeyAlias>
            <!-- Private Key password-->
            <KeyPassword>wso2carbon</KeyPassword>
 </KeyStore>
If we take portal jaggery app(<UES_HOME>/repository/deployment/server/jaggeryapps/portal),

Update ssoConfiguration section in portal.json as follows,
    "ssoConfiguration" : {
        "enabled" : true,
        "issuer" : "portal",
        "identityProviderURL" : "%https.host%/sso/samlsso.jag",
        "keyStorePassword" : "wso2carbon",
        "identityAlias" : "ues",
        "responseSigningEnabled" : "true",
        "keyStoreName" : "/repository/resources/security/wso2carbon.jks",
        "storeAcs" : "%https.host%/store/sso.jag",
        "portalAcs" : "%https.host%/portal/sso.jag",
        "appAcsHost" : "%https.host%"
    }
You have to made the above update in all other jaggery apps within the  <UES_HOME>/repository/deployment/server/jaggeryapps/ directory.

Update ssoConfiguration section in portal/dashboard-template/files/login.jag.hbs, but in the lastest UES distribution you have to make this change within portal/dashboard-template/files/config.json.hbs.
        ssoConfiguration = {
            "enabled": true,
            "issuer": "{{appName}}",
            "identityProviderURL": config.ssoConfiguration.identityProviderURL,
            "keyStorePassword": "wso2carbon",
            "identityAlias": "ues",
            "responseSigningEnabled": "true",
            "keyStoreName": "/repository/resources/security/wso2carbon.jks"
        }

7. Restart WSO2 UES server.

If you browse Home>Configure>Key Stores>View Key Store, you can see the certificate of the private key section as follows.


By providing your IP address or domain name as the first and last name in step 1, you can overcome this host-name mismatch issue while loading UES gadgets.

You can refer this article[1] which explains how to create and add CA signed certificate to any Carbon product.

[1] . http://wso2.com/library/knowledge-base/2011/08/adding-ca-certificate-authority-signed-certificate-wso2-products/

Monday, February 24, 2014

Dashboard - Gadget communication using pub/sub within WSO2 UES

What is pub/sub?

This is a messaging pattern where message senders named publishers and consumers named subscribers. In this architecture publishers are not directly sending messages to consumers but sending to a channel where interesting parties(subscribers) subscribe to this channel and consume messages.

In this blog-post, portal or my dashboard acts as the publisher where user triggers any event to publish and simple gadget acts as the subscriber.

My requirement is to have something similar to the following, When user triggers "Publish a random number" button, dashboard should publish a random number to a predefined channel.Subscriber gadget subscribes to this channel and print the published random number.


How can we create this type of a dashboard?

Refer WSO2-UES documentation on how to create a gadget and how to add gadgets to dashboards.

Note :- 
If you browse <UES_HOME>/repository/deployment/server/jaggeryapps/portal/dashboard-template/files/ directory this is where we store template files for your dashboards. You may update index.jag.hbs file according to your preference, but keep in mind hereafter every time you create a dashboard, these changes will reflect on the dashboard.

Since our requirement is to have this template for all my dashboards, lets update the index.jag.hbs file.

You can find the full updated source gist here[1].
Note I have added the following HTML snippet to get the user input and display the published value.
<input type="button" value="Publish a random number" onclick="publish()"/>
<div id="output"> </div>
Also I have introduced following script, in order to publish a random number to the defined channel.
<script>
function publish() {
               var message = Math.random();
               UESContainer.inlineClient.publish('my-channel', message);
               document.getElementById("output").innerHTML = "Number that is published to the channel : " + message;
        }
</script>
Lets move to the gadget, you may find the source for this sample subscriber gadget here[2] and refer "Subscriber Gadget" section from this blog post[3] if you need to build the subscriber gadget from the scratch.

Interested about inter-gadget communication within WSO2-UES? you may refer the same blog post[3] done by tanya.

[1]. https://gist.github.com/udarakr/d9ebe3c32b64ec4e1ba0
[2]. https://svn.wso2.org/repos/wso2/people/tanya/pub-sub/subscriber/
[3] http://tanyamadurapperuma.blogspot.com/2013/12/inter-gadget-communication-with-wso2-ues.html

Monday, February 17, 2014

Simple web-app with SSO capability which showcase CarbonContext usage

I'm going to use WSO2 Application Server 5.2.1[1] and WSO2 Identity Server 4.5.0[2] to deploy simple web-app with SSO capability to showcase CarbonContext[3] usage.

Without writing this webapp from the scratch I will use/modify the SSOAgentSample which can find here[4].

First let's checkout the source from this location[4] and modify it for our purpose.

a) Open travelocity.properties which can find under SSOAgentSample/src/main/resources/ directory,
vi src/main/resources/travelocity.properties
b) Update following properties, update the port from 8080 to 9764 and comment out AttributeConsumingServiceIndex property.
#The URL of the SAML 2.0 Assertion Consumer
SAML.ConsumerUrl=http://localhost:9764/travelocity.com/samlsso-home.jsp


#Identifier given for the Service Provider for SAML 2.0 attributes
#exchange
#SAML.AttributeConsumingServiceIndex=1701087467
 c) Run following command within SSOAgentSample directory to build the webapp.
mvn clean install
 We are done with the sample webapp for now, but I will update this to showcase CarbonContext usage and provide source in github.

d) Start WSO2 Identity Server, run following within Identity Server home.
sh bin/wso2server.sh
e) Lets register a new service provider in IS, browse Home> Manage> SAML SSO
and press  Register New Service Provider link.Provide following details and press Register.

Issuer : travelocity.com
Assertion Consumer URL:http://localhost:9764/travelocity.com/samlsso-home.jsp

Select other stuff according to your requirements, I'm going to select
Enable Response Signing, Enable Assertion Signing, Enable Single Logout and Enable Attribute Profile. 

Since I'm going to display roles, email address and given name of the logged in user within webapp I will select and add following three claims.

http://wso2.org/claims/role
http://wso2.org/claims/emailaddress
http://wso2.org/claims/givenname


f) Lets upload our webapp to AS and start using a port offset. Copy travelocity.com.war from SSOAgentSample/target to <AS_HOME>/repository/deployment/server/webapps/ directory.

In my local setup,
cp target/travelocity.com.war /home/udara/wso2/workspace/wso2as-5.2.1/repository/deployment/server/webapps
Since I'm starting Application Server in the same local machine which Identity Server instance resides, In-order to avoid port conflicts lets update port-offset within <AS_HOME>repository/conf/carbon.xml.
 <Offset>1</Offset>
g) Start WSO2 Application Server, run following within Application Server home.
sh bin/wso2server.sh
h) Browse http://localhost:9764/travelocity.com/ and select login with SAML from Identity Server and it will automatically redirects to the Identity Server login page.


Provide your username/password and Identity Server will automatically redirects you back to the http://localhost:9764/travelocity.com/samlsso-home.jsp with claims that we select in step e.

CarbonContext[3] usage

Lets update our webapp to list down all users within same tenant.

Add following import statements to the src/main/webapp/samlsso-home.jsp file along with current import statements.

<%@page import="org.wso2.carbon.context.CarbonContext" %>
<%@page import="org.wso2.carbon.user.api.UserRealm" %>
Add following highlighted snippet to obtain the reference to the user-realm from the CarbonContext and print user list.

        </table>
        <a href="index.jsp">Go to Login page</a>
        <hr/>
        <!--Start of The user list-->
        <p><b>The user list</b></p>
            <%
                CarbonContext context = CarbonContext.getCurrentContext();
                UserRealm realm = context.getUserRealm();
                String[] names = realm.getUserStoreManager().listUsers("*", 100);
                    for (String name : names) {
                       %><%=name%><br/><%
                    }
            %>
            <!--End of The user list-->

        <form action="logout">
        <input type="submit" value="Logout">


i) Build(Step c) and re-deploy your webapp.
j) Browse http://localhost:9764/travelocity.com/samlsso-home.jsp and you will get,


I have created a repo to provide the updated source, you can find related repo here[5].


[1]. http://wso2.com/products/application-server/
[2]. http://wso2.com/products/identity-server/
[3]. http://docs.wso2.org/display/Carbon420/CarbonContext+API
[4]. https://svn.wso2.org/repos/wso2/carbon/platform/branches/turing/products/is/4.5.0/modules/samples/sso/SSOAgentSample/
[5]. https://github.com/udarakr/SSOAgentSample-1.0