Sunday, June 7, 2015

How to persist resolv.conf modifications

Default resolv.conf in my Ubuntu box is as follows,
udara@udara-home:~$ cat /etc/resolv.conf
# Dynamic resolv.conf(5) file for glibc resolver(3) generated by resolvconf(8)
#     DO NOT EDIT THIS FILE BY HAND -- YOUR CHANGES WILL BE OVERWRITTEN
nameserver 127.0.1.1
Assume a scenario where I need to use a different DNS.. Eg: -google dns- 8.8.8.8

I can achieve this by modifying above resolv.conf, but that change won't persists after Ubuntu box restart, networking restart or my router restart.

How to persist my change,

Open /etc/network/interfaces using your favorite text editor, in my case it's vi :)
sudo vi /etc/network/interfaces
Update /etc/network/interfaces according to your preference. You can append dns-nameservers 8.8.8.8 to the end.


Eg:-
# interfaces(5) file used by ifup(8) and ifdown(8)
auto lo
iface lo inet loopback
dns-nameservers 8.8.8.8

Note:- I tried different alternatives like update resolv.conf using a bash script during server restart, adding immutable characteristic to resolv.conf using chattr tool. But above is the only viable solution I can recommend to someone.

Tuesday, June 2, 2015

Git merge to restore lost commit

Lets start from a status like following,
udara@udara-home:~/workspace/USSD-Reminder$ git status
# On branch new-feature
# Your branch is ahead of 'origin/new-feature' by 1 commit.
#   (use "git push" to publish your local commits)
#
nothing to commit, working directory clean
So here my local branch is one commit ahead from the remote. Assume mistakenly I did a git reset --hard HEAD^. This will remove my last commit and now I need to find a way to undo my last command.

When we issue the git reset command, commit goes to dangling state and commit is not going to remove permanently. luckily !!

IMPORTANT:

Make sure you don't run git gc until you restore the lost commit. git gc command will trigger the garbage collector and remove all commits which are in dangling state.


Let's start the restoring process....

1. We need to find the SHA1 of the deleted commit so we can bring it back.
 git fsck --lost-found
git fsck command will list down all commits which are in dangling state.
udara@udara-home:~/workspace/USSD-Reminder$ git fsck --lost-found
Checking object directories: 100% (256/256), done.
Checking objects: 100% (16/16), done.
dangling commit 5e3079cc8ac9e15cbfc1f513d249678c0893feab
So we have the SHA1 of the commit which needs to restore.

2. Lets merge this commit.
git merge <SHA1>
udara@udara-home:~/workspace/USSD-Reminder$ git merge 5e3079cc8ac9e15cbfc1f513d249678c0893feab
Updating 0ffdab3..5e3079c
Fast-forward
 config.php | 2 +-
 1 file changed, 1 insertion(+), 1 deletion(-)
Now if we run the git status command it should mention that my local branch is one commit ahead than the remote.

Friday, May 22, 2015

Deleting a remote branch using command line- Git

If you are familiar with GitHub UI after browsing 'branches' tab you can simply delete a branch(If you have relevant permissions).


Lets see how we do the same using command line.
git push <REMOTE_NAME> :<BRANCH_NAME>
Note the space between remote name and the colon. By following this syntax you are asking git to push nothing hence git push will delete the branch in remote repository.

Eg:-
udara@udara-home:~/workspace/h2-social-adaptor$ git push origin :v2
To git@github.com:udarakr/h2-social-adaptor.git
 - [deleted]         v2

Wednesday, May 13, 2015

Cross database pagination problem and how we solved it

When we are developing a webapp with any type of listing, pagination is a must have feature. From the UI perspective we can use infinite scrolling or pages approach.

If you are familiar with google search this is how google uses the second approach,


Now the problem is how we generate listing for a particular page?
Lets take a hypothetical library application where we need to list down existing books, assume we need to list 10 books per page.

This is how we query books to generate the 1st page,
SELECT * FROM BOOKS LIMIT 10;
to generate the 2nd page,
SELECT * FROM BOOKS LIMIT 10 OFFSET 10;
So easy,  by providing the offset value we can dynamically generate our pages.

BUT can we use the same across database types?

If you know the exact backend DB type you gonna use in production, lucky you!
But if you are developing a product which needs to support multiple DB types (MySQL, Oracle, Postgres, H2 ....) above query will fail in some of them. For example above will work in MySQL, H2 and Postgres but will not work in Oracle.

In Oracle 11g you can run following but not in 12c
SELECT *
FROM (
  SELECT b.*, ROWNUM RN
  FROM (
    SELECT *
    FROM BOOKS
    ORDER BY ID ASC
  ) b
  WHERE ROWNUM <= 10
)
WHERE RN > 10
 
Now let's discuss how we solved this problem. Following is high-level architecture of the solution.


In this scenario we have exposed all CRUD operations as OSGI services to the outside world. This component may or may not have DB specific logic. But for sure we don't have any DB type specific logic within our main OSGI component. We have delegated all those DB type specific logic to the DB Adapter.

What are the DB type specific things we can have?

1. Above pagination related stuff (LIMIT, OFFSET)
2. Auto generate key usage(getGenaratedKeys)

How to load correct DB Adapter class through reflection

We can maintain a configuration file where we state the DB Adapter class. Then read that class name within our main component and use/call through reflection.

Reference

http://www.jooq.org/doc/3.5/manual/sql-building/sql-statements/select-statement/limit-clause/

Saturday, April 18, 2015

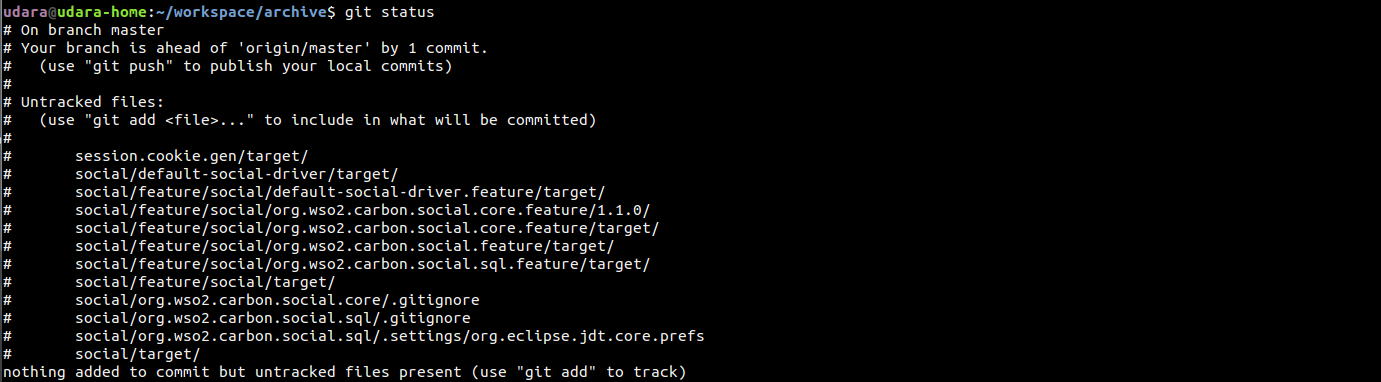
Removing git Untracked files

You can mess up git working directory by merges, mistakes etc. and ends up with lots of unwanted untracked files,


You can use .gitignore to discard those files from the working directory, but that is not the only available option. .gitignore is perfect option to discard .project, target, .swp files permanently from the working directory. But what if we want to discard few files just once.

git clean is the solution, you can decorate this command by providing various parameters. Here in this post I'm focusing only -d, -n and -f  options.

-d, will do a dry run on the working directory, so you can find out what are the files/directories going to be removed.


If you provide the -f option and remove -n based on the permission, this will actually perform the task of removing those listed files.


Make sure to double check while performing this trick.

Monday, April 13, 2015

Access Raspberry Pi GPIO over internet

In my previous post I wrote about this neat framework for Raspberry Pi, WebIOPi. I was able to change the INPUT/OUTPUT direction, set status of the R Pi's GPIO remotely, over the local network.

In order to access WebIOPi over the internet we can use a simple tool called Weaved. You might have already installed "Weaved" during the WebIOPi installation else sign up here to get detailed instructions.

Follow instructions here to configure Weaved on top of your Raspberry Pi.


After configuring, you can list all devices as in above screen-shot and select the device you need to control. I only have one device registered here "media-center". I can get the publicly available URL of my device to control GPIO Pins over internet.


Still I will be able to access WebIOPi interface over the local network too.


I tried my same old example of measuring voltage difference between Ground PIN and PIN #12.


WebIOPi - Raspberry Pi IoT framework

I spent hours with WebIOPi framework today and decided to keep this note as a future reference.

Few days back I decided to create a RPi media center where I can play media files available within any device connected to my home network. I used WebIOPi to control GPIO and communicate with my RPi back and forth remotely from my mobile device.

How to install WebIOPi

You need python and make sure to install python before moving forward.

i) You can directly download install from the pi store.


ii) I took the second method, Downloaded WebIOPi from sourceforge and execute,

tar xvzf WebIOPi-0.7.1.tar.gz
cd WebIOPi-0.7.1
sudo ./setup.sh

webiopi-0.7.1 is the latest version available at the moment.

After installing run  sudo /etc/init.d/webiopi start to start the webIOPi service.

Let's do some basic stuff to see our installation progress. If you haven't specify the port number webIOPi service will start on the port 8000. So let's find the IP address of the RPi and browse, http://192.168.1.104:8000. Provide webiopi as the username and raspberry as the password.


Click on the GPIO Header link and browse, So i'm using Raspberry Pi B+ and this is the GPIO pin layout.

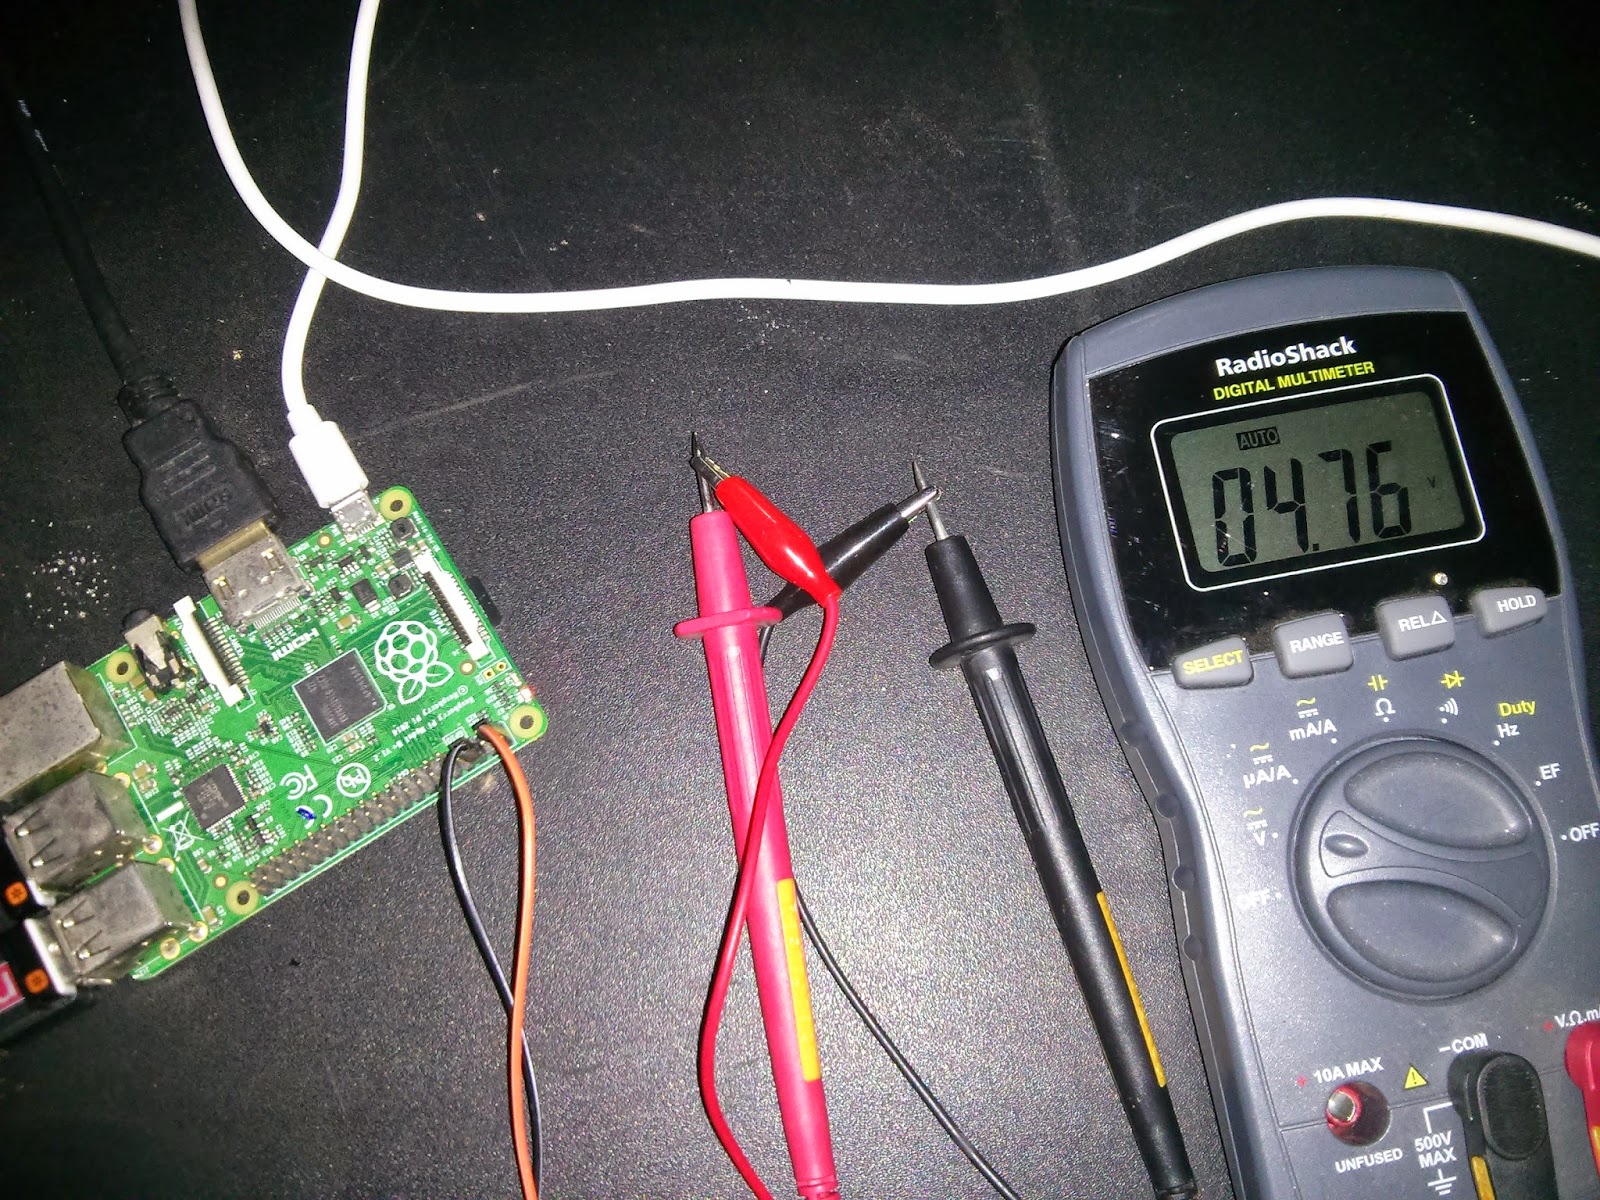
Let's use 1, 2, 6 PINs and verify this voltage values. I'm going to use a multimeter, two crocodile probes and two jumper cables for this.

Connect negative end to the ground PIN(6) and positive end to the PIN #1. Following is my voltage reading.


Disconnect the positive end from PIN 1 and connect to PIN #2,


There is a slight difference in the voltage reading, this can be due to the fact that I'm using wireless network adapter, mouse, keyboard attached to my RPi.

Let's toggle the WebIOPi OUT/IN button to change the GPIO direction/pin to change the output state and check multimeter reading one more time. For this I'm going to use PIN #12 so connected positive probe to the PIN #12. Then switched GPIO direction ans outout status like this.


This is my multimeter reading,


Great! Now I can control my Raspberry Pi's GPIO remotely. But here I accessed WebIOPi interface over the local network. I will put a note on "How to access WebIOPi interface over internet" very soon.