Thursday, January 29, 2015

Change location of the WSO2 Carbon server logs

I'm using WSO2 AM-1.8.0 in this post. Since AM-1.8.0 released in Carbon-4.2.0 same steps apply to all products within this carbon version.

By default all log files are stored in <CARBON_HOME>/repository/logs/ directory.

Lets assume we need to move all these logs to /var/logs/wso2 directory.

1. Open log4j.properties file resides within <CARBON_HOME>/repository/conf/ directory and update following properties as mentioned below.


log4j.appender.SERVICE_APPENDER.File
log4j.appender.TRACE_APPENDER.File
log4j.appender.CARBON_LOGFILE.File
log4j.appender.ERROR_LOGFILE.File
log4j.appender.AUDIT_LOGFILE.File
log4j.appender.ATOMIKOS.File

log4j.appender.SERVICE_APPENDER.File=/var/logs/wso2/${instance.log}/wso2-apigw-service${instance.log}.log
log4j.appender.TRACE_APPENDER.File=/var/logs/wso2/${instance.log}/wso2-apigw-trace${instance.log}.log
log4j.appender.CARBON_LOGFILE.File=/var/logs/wso2/${instance.log}/wso2carbon${instance.log}.log
log4j.appender.ERROR_LOGFILE.File=/var/logs/wso2/${instance.log}/wso2-apigw-errors.log
log4j.appender.AUDIT_LOGFILE.File=/var/logs/wso2/audit.log
log4j.appender.ATOMIKOS.File =
/var/logs/wso2/tm.out 

2.  configure HTTP Access log file by changing <CARBON_HOME>/repository/conf/tomcat/catalina-server.xml
<Valve className="org.apache.catalina.valves.AccessLogValve"
directory="/var/logs/wso2"
prefix="localhost_access_log_sample."
suffix=".log"
pattern="%{xxx}i %{xxx}o"
resolveHosts="false"/>
 You may face few hick-ups if you need to move ALL logs from default location.

Eg: - patches.log, wso2carbon-trace-messages.log

At the moment there is no direct way to configure store location for above logs.These properties exist within <CARBON_HOME>/lib/org.wso2.carbon.server-4.2.0.jar and patch applying process take place even before the carbon server start. So we have bundled log4j.properties file within org.wso2.carbon.server-4.2.0.jar.

I will note down a workaround here.

Go to <CARBON_HOME>/lib/ Directory. Open the org.wso2.carbon.server-4.2.0.jar with an archive manager. Open the log4j.properties using a text editor and modify following properties.
log4j.appender.CARBON_LOGFILE.File
log4j.appender.CARBON_TRACE_LOGFILE.File
log4j.appender.CARBON_PATCHES_LOGFILE
 

Tuesday, December 16, 2014

Memcache and PHP

In this post I'm going to use PHP Memcache module as an interface to memcached. If you need to reduce the database load for your webapp this approach seems pretty cool.

I assume you have already installed PHP/MySQL and a compiler on your machine. You can install "build-essential" in order to install Memcache.
sudo apt-get install build-essential

Install php5-memcache
sudo apt-get install php5-memcache

Install Memcache daemon
sudo apt-get install memcached

Install PHP Pear
sudo apt-get install php-pear
Add Memcache using PECL module
sudo pecl install memcache
Update memcache.ini using following,
extension=memcache.so
Verify  Memcache installation

i) Try telnetting to your Memcache instance using,
telnet localhost 11211
ii) phpinfo()


Lets write our first simple PHP script,
<?php
$memcache = new Memcache();
$memcache->addServer('localhost', 11211) or die ("Could not connect");
$key = md5('my-name'); // Unique key
$cache_result = array();
$cache_result = $memcache->get($key); // Memcached object
if($cache_result){
// Second Request
$demos_result=$cache_result;
echo "Result found in memcache\n";
}else{
// Initial Request
$name= "Udara R";
$memcache->set($key, $name);
echo "Result not found in memcache, added to the memcache \n";
}
echo $cache_result."\n";
?>
So here I'm using md5 value of the "my-name" string as the key, you can use unique ID (UUID)  while storing values in Memcache.
$key = md5('my-name');

Then I'm trying to retrieve existing value attached to my key,
$cache_result = $memcache->get($key);
If we are unable to retrieve anything from Memcache, then set key-value pair using,
$memcache->set($key, $name);
Our objective is to reduce the database load in this post, so we can interrupt our data retrieve logic to find relevant data in Memcache first, then query from database and put in to the cache layer, if not exists.

Friday, December 12, 2014

Make developer life easy - Vagrant

I recently wrote a post on docker, similar tool which makes developer life easy. Then I tried another neat tool "Vagrant" and thought of putting this post so I can follow these steps at anytime :)

Instead of every team member working on their own local server with own configuration, you can configure a portable dev workstation which is identical to your QA/Production environment.Any one at any time can spin their own dev workstation without making any configuration/application changes in their actual machine.

You can find list of available Vagrant boxes here[1]. These are available in various flavors such as VirtualBox, VMware, AWS etc...

I'm going to try ubuntu/trusty32 on VirtualBox where I'm going to configure apache server to host a simple webapp. Before that we need to install Vagrant & VirtualBox on the host machine.

sudo apt-get install vagrant
VirtualBox : https://www.virtualbox.org/wiki/Linux_Downloads

1. Add required Vagrant box to the host machine. This will be an one-time download after this you can spin any number of vagrant virtual machines using this box.
vagrant box add ubuntu/trusty32
udara@udara-home:~/workspace/vagrant$ vagrant box add ubuntu/trusty32
==> box: Loading metadata for box 'ubuntu/trusty32'
    box: URL: https://vagrantcloud.com/ubuntu/trusty32
==> box: Adding box 'ubuntu/trusty32' (v14.04) for provider: virtualbox
    box: Downloading: https://vagrantcloud.com/ubuntu/boxes/trusty32/versions/14.04/providers/virtualbox.box
==> box: Successfully added box 'ubuntu/trusty32' (v14.04) for 'virtualbox'!


2. Initialize current directory as a Vagrant environment  
vagrant init ubuntu/trusty32
udara@udara-home:~/workspace/vagrant$ vagrant init ubuntu/trusty32
A `Vagrantfile` has been placed in this directory. You are now
ready to `vagrant up` your first virtual environment! Please read
the comments in the Vagrantfile as well as documentation on
`vagrantup.com` for more information on using Vagrant.


init command will create the Vagrantfile config with the following properties within the current working directory.
VAGRANTFILE_API_VERSION = "2"
Vagrant.configure(VAGRANTFILE_API_VERSION) do |config|
config.vm.box = "ubuntu/trusty32"

3. Spin up trusty32 box.
vagrant up
udara@udara-home:~/workspace/vagrant$ vagrant up
Bringing machine 'default' up with 'virtualbox' provider...
==> default: Importing base box 'ubuntu/trusty32'...
==> default: Matching MAC address for NAT networking...
==> default: Checking if box 'ubuntu/trusty32' is up to date...
==> default: Setting the name of the VM: vagrant_default_1418340978158_41043
.....

.....
==> default: Machine booted and ready!
==> default: Checking for guest additions in VM...
==> default: Mounting shared folders...
    default: /vagrant => /home/udara/workspace/vagrant


This command will start your VM using the configuration provided within the 
Vagrantfile(here we are using default) You can see the running Vagrant box if you open the VirualBox application.


4. Access shell of our vagrant machine.
vagrant ssh
udara@udara-home:~/workspace/vagrant$ vagrant ssh
Welcome to Ubuntu 14.04.1 LTS (GNU/Linux 3.13.0-43-generic i686)

 * Documentation:  https://help.ubuntu.com/

  System information as of Thu Dec 11 23:36:38 UTC 2014

  System load:  0.74              Processes:           88
  Usage of /:   2.6% of 39.34GB   Users logged in:     0
  Memory usage: 11%               IP address for eth0: 10.0.2.15
  Swap usage:   0%

  Graph this data and manage this system at:
    https://landscape.canonical.com/

  Get cloud support with Ubuntu Advantage Cloud Guest:
    http://www.ubuntu.com/business/services/cloud

0 packages can be updated.
0 updates are security updates.


vagrant@vagrant-ubuntu-trusty-32:~$


This command will SSH into the running Vagrant machine.

5. Assign IP Adress to our guest machine.

Go back to your host machine by using command exit.
Update existing Vagrantfile with the following content. I'm using Guest IP Address as 33.33.3.3 here.
 config.vm.network "private_network", ip: "33.33.3.3"
In order to reflect this change to our Vagarnt box we have to use reload command,
vagrant reload
udara@udara-home:~/workspace/vagrant$ vagrant reload
==> default: Attempting graceful shutdown of VM...
==> default: Checking if box 'ubuntu/trusty32' is up to date...
==> default: Clearing any previously set forwarded ports...
==> default: Fixed port collision for 22 => 2222. Now on port 2200.
==> default: Clearing any previously set network interfaces...
==> default: Preparing network interfaces based on configuration...
    default: Adapter 1: nat
    default: Adapter 2: hostonly
==> default: Forwarding ports...
    default: 22 => 2200 (adapter 1)
==> default: Booting VM...
.....

.....
==> default: Machine already provisioned. Run `vagrant provision` or use the `--provision`
==> default: to force provisioning. Provisioners marked to run always will still run.


This will restart the existing box and load the new configuration.

6. Let's install Apache web server on our Vagrant box. SSH again using the vagrant ssh command as in step 4. Then run following command to install apache2.
sudo apt-get install apache2
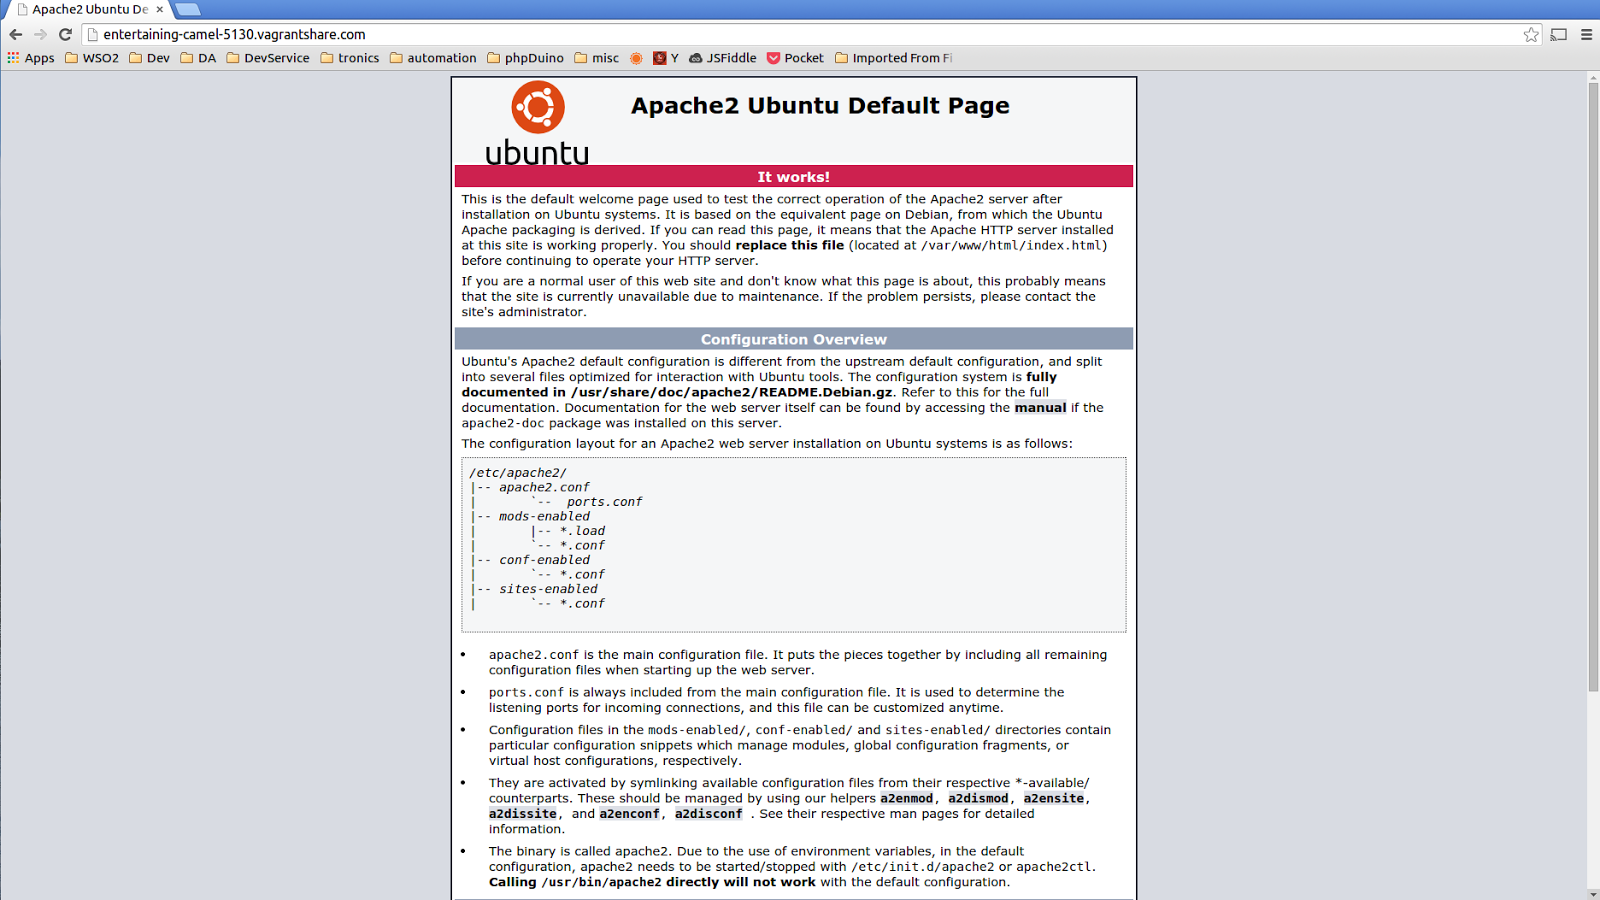
This command will install and start the apache server with default configs. Now if you browse 33.33.3.3 from your host machine you will get the defualt "It Works" page,


7. Sync directories between the host & Guest OSs.

a) Create sample file sync.txt within your host's vagrant workspace.

udara@udara-home:~/workspace/vagrant$ ls
sync.txt  Vagrantfile


b) SSH in to the guest machine using vagrant ssh.


c) Change directory in to /vagrant using cd /vagrant/ . If you list files within this directory you can find the sync.txt created on your host machine inside the guest as well.

vagrant@vagrant-ubuntu-trusty-32:/vagrant$ ls
Vagrantfile  sync.txt


Vagrant keep the folders in sync so you can use the host machine to update your project and keep sync without any hassle. By default, Vagrant shares your project directory but you can add any additional directories using.
config.vm.synced_folder "<host_directory_path>", "<guest_directory_path>"

8. Share and collaborate environments, This allows you to share Vagrant environment to anyone by providing a unique URL which routes to your vagrant box.

a) Create account at hashicorp.
b) Use vagrant command within your teminal to get access.
vagrant login
udara@udara-home:~/workspace/vagrant$ vagrant login
In a moment we'll ask for your username and password to Vagrant Cloud.
After authenticating, we will store an access token locally. Your
login details will be transmitted over a secure connection, and are
never stored on disk locally.

If you don't have a Vagrant Cloud account, sign up at vagrantcloud.com

Username or Email: udarar@wso2.com
Password (will be hidden):
You're now logged in!


c) Share using vagrant share command.
vagrant share
udara@udara-home:~/workspace/vagrant$ vagrant share
==> default: Detecting network information for machine...
    default: Local machine address: 33.33.3.3
    default: Local HTTP port: 80
    default: Local HTTPS port: disabled
==> default: Checking authentication and authorization...
==> default: Creating Vagrant Share session...
    default: Share will be at: entertaining-camel-5130
==> default: Your Vagrant Share is running! Name: entertaining-camel-5130
==> default: URL: http://entertaining-camel-5130.vagrantshare.com


By using the provided URL we can browse our apache server from anywhere now :)


You can terminate this session by pressing ctrl+c.

9. Remove environment
vagrant destroy

udara@udara-home:~/workspace/vagrant$ vagrant destroy
    default: Are you sure you want to destroy the 'default' VM? [y/N] y
==> default: Destroying VM and associated drives...


[1] https://vagrantcloud.com/boxes/search

Thursday, December 11, 2014

Enabling secure vault in WSO2 BPS

You can enable secure vault in any WSO2 product, which prevents us keeping plain text password in carbon configurations using WSO2 Carbon Secure Vault documentation.

But in BPS, <BPS_HOME>/repository/conf/datasources/master-datasources.xml is bit different from other products. This includes only WSO2_CARBON_DB related data-source configurations(may be other data-source definitions according to your deployment).

We have a separate <BPS_HOME>/repository/conf/datasources.properties file with the bps related data-source configs.

At the moment there is no direct way to enable secure vault for this config. But we can move config data within datasources.properties in to the
master-datasources.xml and follow the default guidelines.

1. Update existing master-datasources.xml with following data-source configuration.
<datasource>
    <name>BPS_DS</name>
    <description></description>
    <jndiConfig>
        <name>bpsds</name>
    </jndiConfig>
    <definition type="RDBMS">
        <configuration>
        <url>jdbc:mysql://localhost:3306/bps?autoReconnect=true</url>
        <username>bps_user</username>
        <password>bps_password</password>
        <driverClassName>com.mysql.jdbc.Driver</driverClassName>
        <maxActive>150</maxActive>
        <maxWait>360000</maxWait>
        <minIdle>5</minIdle>
        <testOnBorrow>true</testOnBorrow>
        <validationQuery>SELECT 1</validationQuery>
        <validationInterval>30000</validationInterval>
        <jdbcInterceptors>QueryTimeoutInterceptor(queryTimeout=30)</jdbcInterceptors>
        <timeBetweenEvictionRunsMillis>60000</timeBetweenEvictionRunsMillis>
        <numTestsPerEvictionRun>15</numTestsPerEvictionRun>
        <testWhileIdle>true</testWhileIdle>
        </configuration>
    </definition>
</datasource>
make sure to update url, username, password, driverClassName according to your environment.

2. Remove existing datasources.properties file.

3. Comment following lines in attachment-management.xml which locates at <BPS_HOME>/repository/conf/ directory.
            <JNDIInitialContextFactory>com.sun.jndi.rmi.registry.RegistryContextFactory</JNDIInitialContextFactory><JNDIProviderUrl>rmi://localhost:2199</JNDIProviderUrl>
4. Comment following line in bps.xml which locates at <BPS_HOME>/repository/conf/ directory.
<tns:JNDI contextFactory="com.sun.jndi.rmi.registry.RegistryContextFactory" providerURL="rmi://localhost:2199"/>
5. Comment following lines in humantask.xml file which locates at <BPS_HOME>/repository/conf/ directory.
        <JNDIInitialContextFactory>com.sun.jndi.rmi.registry.RegistryContextFactory</JNDIInitialContextFactory><JNDIProviderUrl>rmi://localhost:2199</JNDIProviderUrl>
We are done with the data-source configuration.

There is b4p-coordination-config.xml configuration file with plain text password, which we need to secure. You can follow "Securing username/password with secure vault section" here[2].

There is a separate configuration to "Retired BPEL Package Cleanup" where we have plain text password. Since this is for a specific task which has no direct relationship to the BPS runtime we can remove plain-text password here. So you have put it back when you need to run process-cleanup command line tool(processcleanuptool.sh|processcleanuptool.bat for Windows).

Note:- All above configuration changes work well in a BPS-3.2.0 deployment.

[1] https://docs.wso2.com/display/Carbon420/WSO2+Carbon+Secure+Vault
[2] https://docs.wso2.com/display/BPS320/Advanced+Configurations+for+Human+Task+Coordination

banish404 | Easy way to remove stale PPAs and Software-Sources

Are you having trouble manually updating PPAs and Software-Sources from your Ubuntu box to solve 404 not founds while updating the system. (I tried banish404 on 13.10).

Issues I'm having while running apt update,
 
Err http://ppa.launchpad.net saucy/main amd64 Packages
  404  Not Found
Err http://ppa.launchpad.net saucy/main i386 Packages
  404  Not Found

Ign http://ppa.launchpad.net saucy/main Translation-en_US
Ign http://ppa.launchpad.net saucy/main Translation-en
Ign http://ppa.launchpad.net saucy/main Translation-en_US
Ign http://ppa.launchpad.net saucy/main Translation-en
Ign http://ppa.launchpad.net saucy/main Translation-en_US
Ign http://ppa.launchpad.net saucy/main Translation-en
Ign http://ppa.launchpad.net saucy/main Translation-en_US
Ign http://ppa.launchpad.net saucy/main Translation-en
Fetched 13.0 kB in 16s (772 B/s)
W: Failed to fetch http://ppa.launchpad.net/psyke83/ppa/ubuntu/dists/saucy/main/binary-amd64/Packages  404  Not Found

W: Failed to fetch http://ppa.launchpad.net/psyke83/ppa/ubuntu/dists/saucy/main/binary-i386/Packages  404  Not Found

E: Some index files failed to download. They have been ignored, or old ones used instead.


banish404 is a simple tool to automate this hassle.

sudo add-apt-repository ppa:fossfreedom/packagefixes
sudo apt-get update
sudo apt-get install banish404

How to use,
sudo banish404
This will ask for your permission one-by-one to remove stale PPAs and  Software-Sources.More importantly it will back-up your existing sources in to the /etc/apt/ directory.

udara@udara-home:~$ sudo banish404
sources backup folder: /etc/apt/sources_20141210-12:18:33
: 3 3    
checking PPAs...
Disabling /etc/apt/sources.list.d/psyke83-ppa-saucy.list...
Done!
Disabling /etc/apt/sources.list.d/psyke83-ppa-saucy.list...
Done!
checking software sources...


Now if I run apt update, I don't see any 404 not founds.

Tuesday, December 2, 2014

DOM compatibility & fallbacks

DOM compatibility is somewhat a headache for front-end developers when it comes to creating cross-browser support webapps.
I'm writing this small note to self ;) , on a fall-back hack which we can use to overcome this headache.


I'm taking innerText & textContent properties to explain this further,


This image[Screen-shot from 1] depicts browser support for innerText & textContent properties.

In order to support this we can use something like following,
//create div element
var div = document.createElement('div');
//check textContent support
if (div.textContent) { 

     div.textContent = "textContent support exists.";
// go for the fall-back
} else if (div.innerText) { 

     div.innerText = "No textContent support."; 
}
So with this we don't need to worry about setting content to our div.

[1] http://www.quirksmode.org/dom/html/

Sunday, November 30, 2014

Jump in to the world of containers with docker

Why we need containers?

If we consider SDLC there are number of parties involve in different activities on our application.

Eg :- Developers, Testers, SysAdmins etc

There are various problems which these people need to address, because of platform and dependency standardization problems.

Docker address this problem with an open platform which "Build, Ship and Run Any App, Anywhere". Why docker VM's have already solved this problem? yes but with a virtual machine we are shipping our application+dependencies (assume 200MB) + guest OS (> 1GB) ouch :( that is painful.

Compared to VM, docker container includes only our application+dependencies :) Docker engine runs on top of the host OS and it's portable.

Let's jump in to our container, in this sample I'm going to create a docker container to ship WSO2 Enterprise store.

udara@udara-home:~$ sudo docker images
[sudo] password for udara:
REPOSITORY          TAG                 IMAGE ID            CREATED             VIRTUAL SIZE
ubuntu              latest              86ce37374f40        4 days ago          192.7 MB


I have ubuntu docker image with me and I'm going to start it.
sudo docker run -i -t ubuntu /bin/bash

With the above docker command I can login to the terminal of our newly created node,

udara@udara-home:~$ sudo docker run -i -t ubuntu /bin/bash
root@df8485e65e93:/#


Before running Enterprise Store inside our container I need to follow installation guidelines available here. So in this scenario we need to install JDK within our container.

Run following commands within your container terminal to install Java, zip and unzip.
apt-get install software-properties-common
add-apt-repository ppa:webupd8team/java
apt-get update
apt-get install oracle-java7-installer zip unzip

During this process if get "apt-get can't find the package" error similar to following as in my case use following command to lists to use old-releases.ubuntu.com,
sudo sed -i -e 's/archive.ubuntu.com\|security.ubuntu.com/old-releases.ubuntu.com/g' /etc/apt/sources.list

Err http://archive.ubuntu.com/ubuntu/ quantal/main openssl amd64 1.0.1c-3ubuntu2
  404  Not Found [IP: 91.189.91.14 80]
Err http://archive.ubuntu.com/ubuntu/ quantal/main ca-certificates all 20120623
  404  Not Found [IP: 91.189.91.14 80]
Err http://archive.ubuntu.com/ubuntu/ quantal/main libgirepository-1.0-1 amd64 1.33.14-1
  404  Not Found [IP: 91.189.91.14 80]
Err http://archive.ubuntu.com/ubuntu/ quantal/main gir1.2-glib-2.0 amd64 1.33.14-1
  404  Not Found [IP: 91.189.91.14 80]
Err http://archive.ubuntu.com/ubuntu/ quantal/main iso-codes all 3.38-1
  404  Not Found [IP: 91.189.91.14 80]
Err http://archive.ubuntu.com/ubuntu/ quantal/main python-apt-common all 0.8.7ubuntu4
  404  Not Found [IP: 91.189.91.14 80]
Err http://archive.ubuntu.com/ubuntu/ quantal/main python3-apt amd64 0.8.7ubuntu4
  404  Not Found [IP: 91.189.91.14 80]
Err http://archive.ubuntu.com/ubuntu/ quantal/main python3-dbus amd64 1.1.1-1
  404  Not Found [IP: 91.189.91.14 80]
Err http://archive.ubuntu.com/ubuntu/ quantal/main python3-gi amd64 3.4.0-1
  404  Not Found [IP: 91.189.91.14 80]
Err http://archive.ubuntu.com/ubuntu/ quantal/main unattended-upgrades all 0.79.3ubuntu4
  404  Not Found [IP: 91.189.91.14 80]
Err http://archive.ubuntu.com/ubuntu/ quantal/main python3-software-properties all 0.92.9
  404  Not Found [IP: 91.189.91.14 80]
Err http://archive.ubuntu.com/ubuntu/ quantal/main software-properties-common all 0.92.9

Set JAVA_HOME property using,
export JAVA_HOME=/usr/lib/jvm/java-7-oracle

Since Java is the only dependency to start any WSO2 product, I'm going to save the container status so I can create a container with any other product in future without installing Java.

Before Creating a new image from the above changes, we need to get our container ID,

How to list existing containers ID?

udara@udara-home:~$ sudo docker ps
CONTAINER ID        IMAGE               COMMAND             CREATED             STATUS              PORTS               NAMES
df8485e65e93        ubuntu:latest       "/bin/bash"         6 minutes ago       Up 6 minutes                            compassionate_elion  
10a4800560de        ubuntu:latest       "/bin/bash"         27 minutes ago      Up 27 minutes                           dreamy_nobel


Let's find out changes we have done to the existing container by running,
sudo docker diff <container_id>
Eg :- sudo docker diff e69ccb432919

Ok, now I'm going to create new docker image by providing name "udara/java7"
sudo docker commit e69ccb432919 udara/java7

Our new image "udara/java7" is listed if I run command sudo docker images

udara@udara-home:~$ sudo docker images
REPOSITORY          TAG                 IMAGE ID            CREATED             VIRTUAL SIZE
udara/java7         latest              76f948ba0aff        24 seconds ago      762.3 MB
ubuntu              latest              86ce37374f40        4 days ago          192.7 MB
base                latest              b750fe79269d        20 months ago       175.3 MB
base                ubuntu-12.10        b750fe79269d        20 months ago       175.3 MB
base                ubuntu-quantal      b750fe79269d        20 months ago       175.3 MB
base                ubuntu-quantl       b750fe79269d        20 months ago       175.3 MB


Lets start Enterprise Store instance within our initial docker image,

Before that we need to copy Enterprise Store distribution from our host OS to docker image. You need to run following commands within your host OS.

Run following command to get the full container ID
sudo docker inspect -f  '{{.Id}}'<container_id>
Eg:- sudo docker inspect -f  '{{.Id}}' e69ccb432919

This command will return the full container ID, in my case its,

udara@udara-home:~$ sudo docker inspect -f   '{{.Id}}' e69ccb432919
e69ccb432919f7432e1cf804693662a9adc61fc5a10f16d1a87b0ff7993b1254


Let's copy ES to the docker image using following command.
sudo cp wso2store-1.0.0.zip /var/lib/docker/aufs/mnt/<full_container_id>/tmp/

Eg:-

sudo cp wso2store-1.0.0.zip /var/lib/docker/aufs/mnt/e69ccb432919f7432e1cf804693662a9adc61fc5a10f16d1a87b0ff7993b1254/tmp/

I copied wso2store-1.0.0.zip in to the /tmp directory of my docker instance. Go into the /tmp directory an unzip ES distribution. Change directory to wso2store-1.0.0/bin and start ES instance using sh wso2server.sh

Now let's create a separate Docker image consists of ES distribution which we can share among core developers/QA team. They can just start ES instance without worrying about underlying dependencies. (this example only Java but in a real world project there can be thousands of dependencies)

If you are new to docker follow this try-it tool available on your browser. If you want to try docker on your local machine here is the link to installation.Docker is available on almost all environments.